1. Overview
Click here to go directly to Steps to install SSL Certificate
Hello all website builder, Ever wondered how you can avoid paying more than $200 for SSL Certificate or Encryption to your Hosting service provider?
Today, we are discussing a very effective way of installing SSL Certificates ourselves for our website, instead of purchasing it. Thereby, saving money as well as learning basics.
In this article we will go through simple steps to install SSL Certificate for free for your website. Requirements:
- Access to cPanel of your website. All Hosting service provider provides cPanel access.
- A domain registered with any hosting services like GoDaddy, Hostinger, inmotion, hostgator etc.
2. What is SSL Certificate ?
In simplest language, Secure Sockets Layer (SSL) certificates, also called Digital Certificates, are used to establish an encrypted connection between a browser or user’s computer and a server or website it is interacting with. Let us say there are 2 websites, one having SSL Certificate and another is missing the SSL Certificate.
Then one having Certificate will establish a secure encrypted connection for any types of transfer between your browser and website server. Let us say, you enter your username and password or any sensitive information. All such information can't be eavesdropped or interrupted by any hacker.
While in case of non-SSL website, the data transfer is not encrypted and can be eavesdropped or secretly accessed, which is obviously unsafe.
3. Why SSL Certificate important ?
Apart from making your website more secure for the users and your target audience. It also boosts Google ranking of your website in google search, builds trust among users, will be accessed if user's browser is behind corporate network are few benefits of having SSL certificates.
But SSL certificate is charged by hosting services, that's the reasons, many people with basic website and limited knowledge often choose not to take SSL Certificate for their website, which eventually harm them and never get their website a good ranking.
As per a research in 2017, more than 97% of websites never invite large number of audiences just because they don't have SSL Certificate and hence, simply die.
4. Steps to install SSL Certificate
Steps
- Go to https://zerossl.com and select “Online tools”.
- Select ONLINE TOOLS (Click “START”). Click on "EN" Flag.

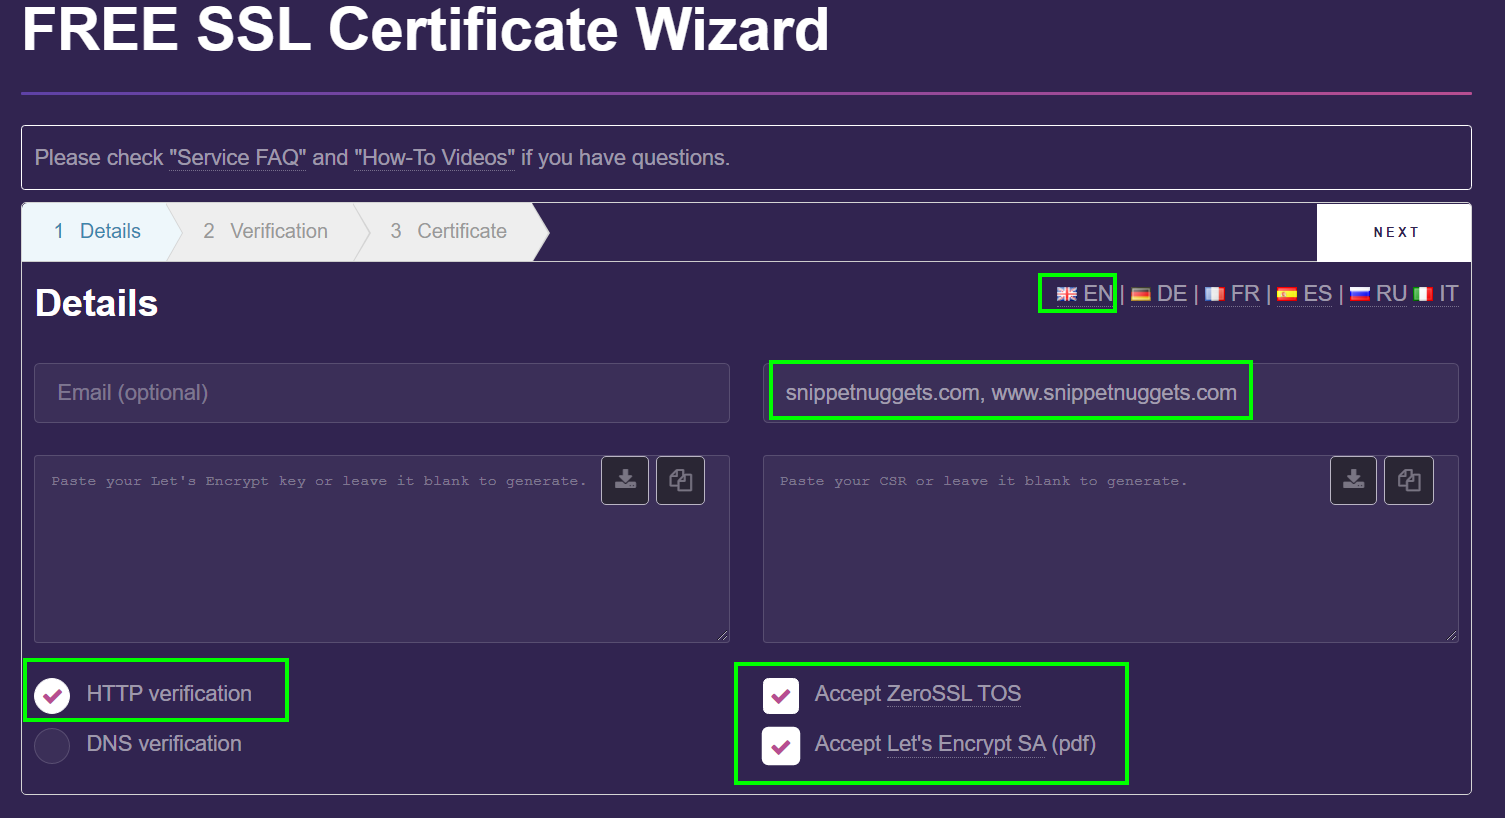
- Enter your email (optional), Enter yourdomain.com, www.yourdomain.com (no http:// or https://). For example, in my case I entered: "snippetnuggets.com, www.snippetnuggets.com". Check all 3 checkboxes. Please note in screenshot below.
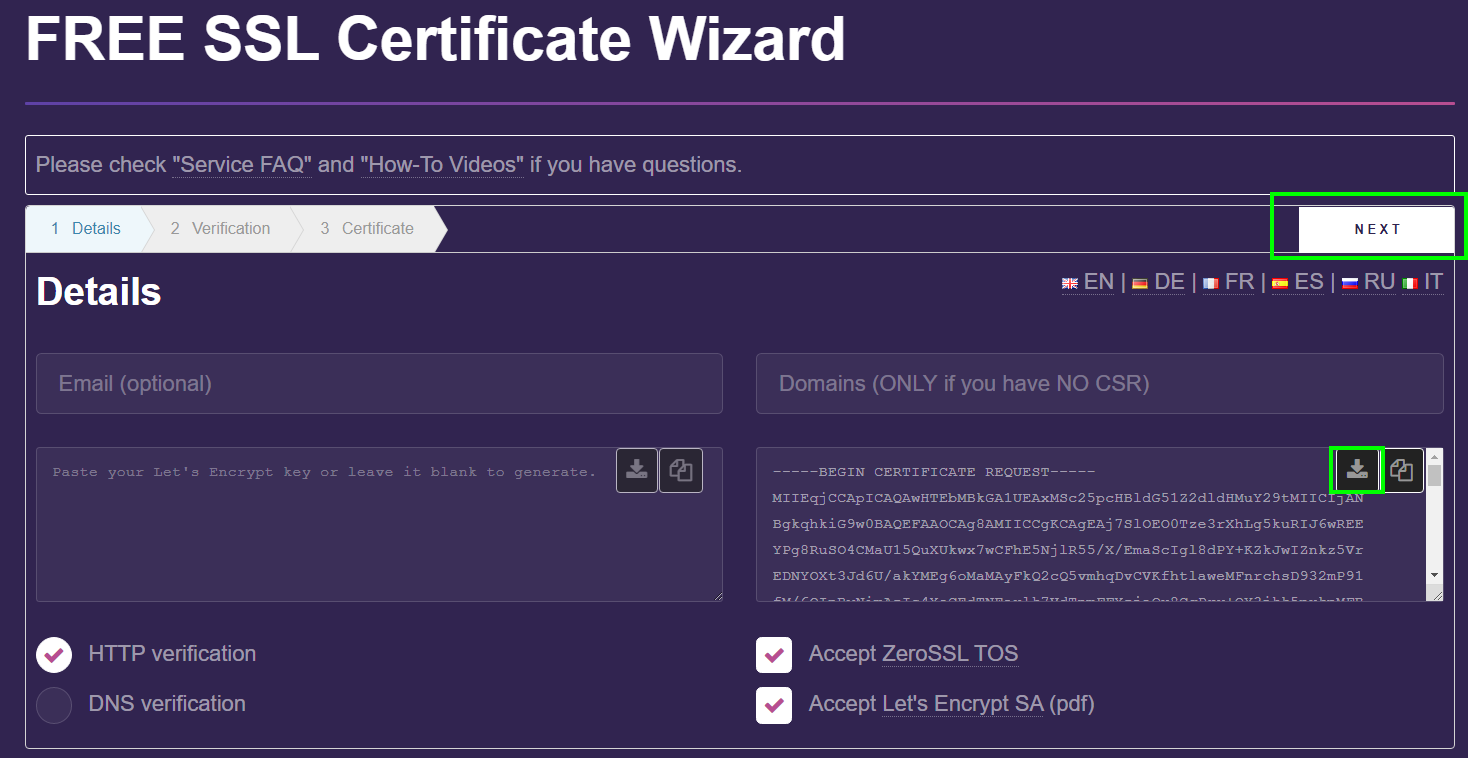
- Click NEXT. You will see CSR generated in the right field. Domains you entered will disappear. Download CSR to your local system.
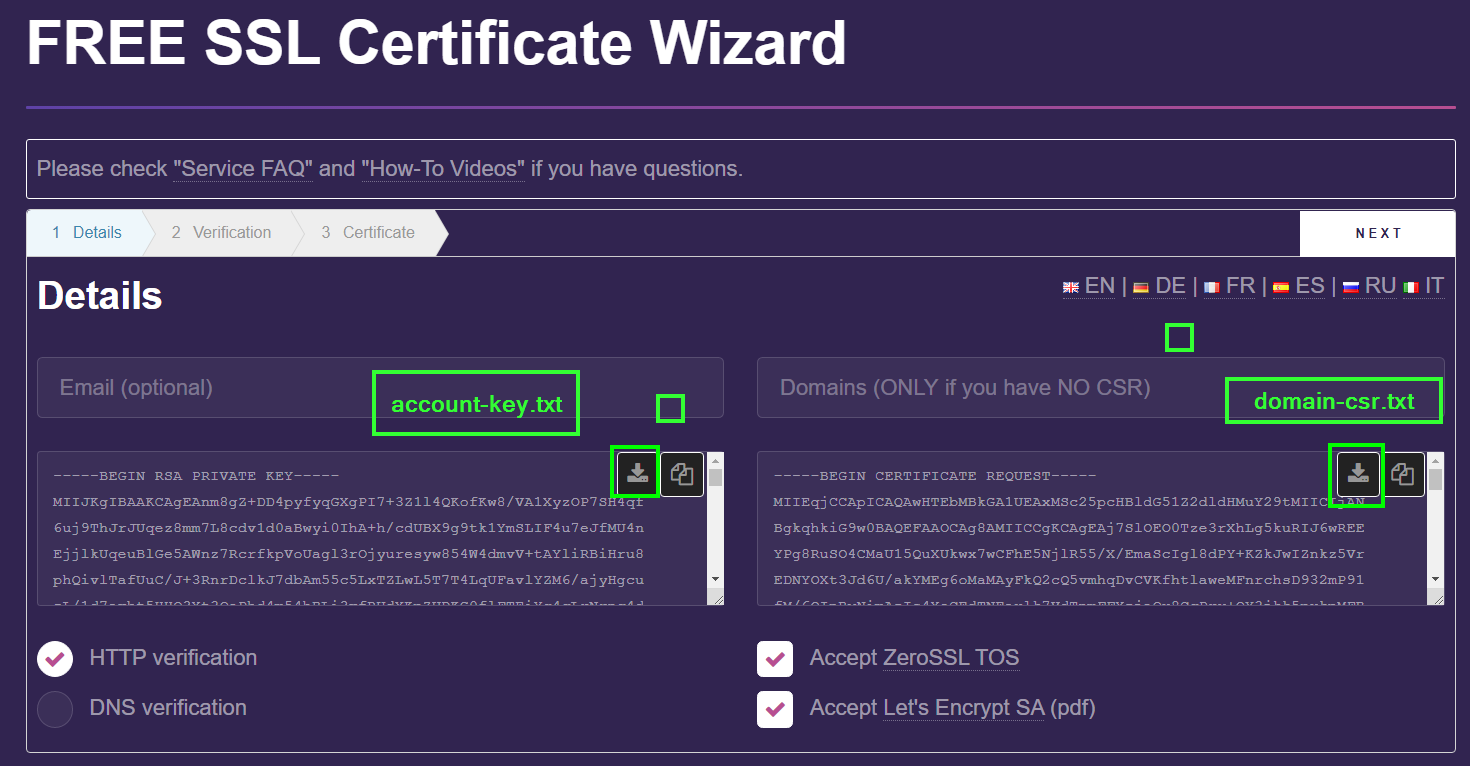
- Click NEXT again and your account-key.txt and domain-csr.txtwill be generated. Download them too and keep it safe.
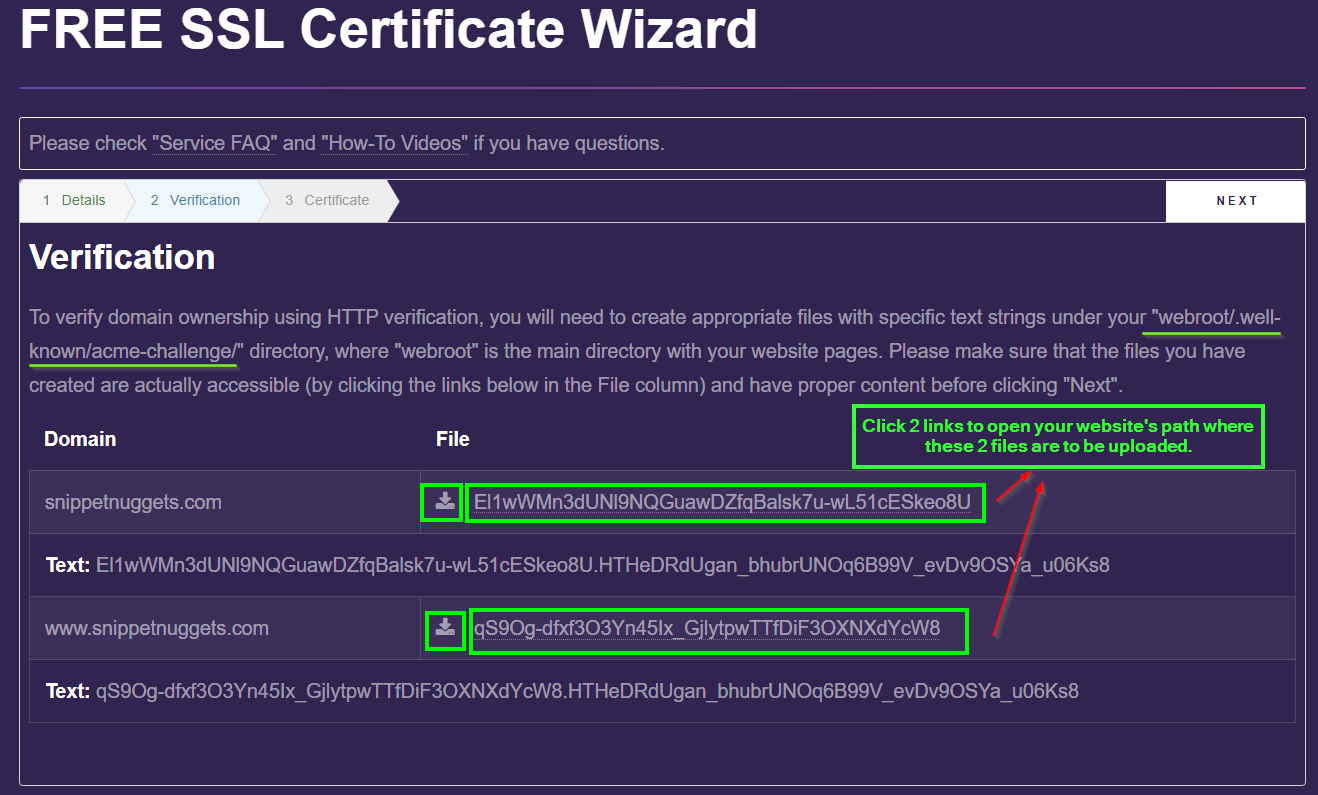
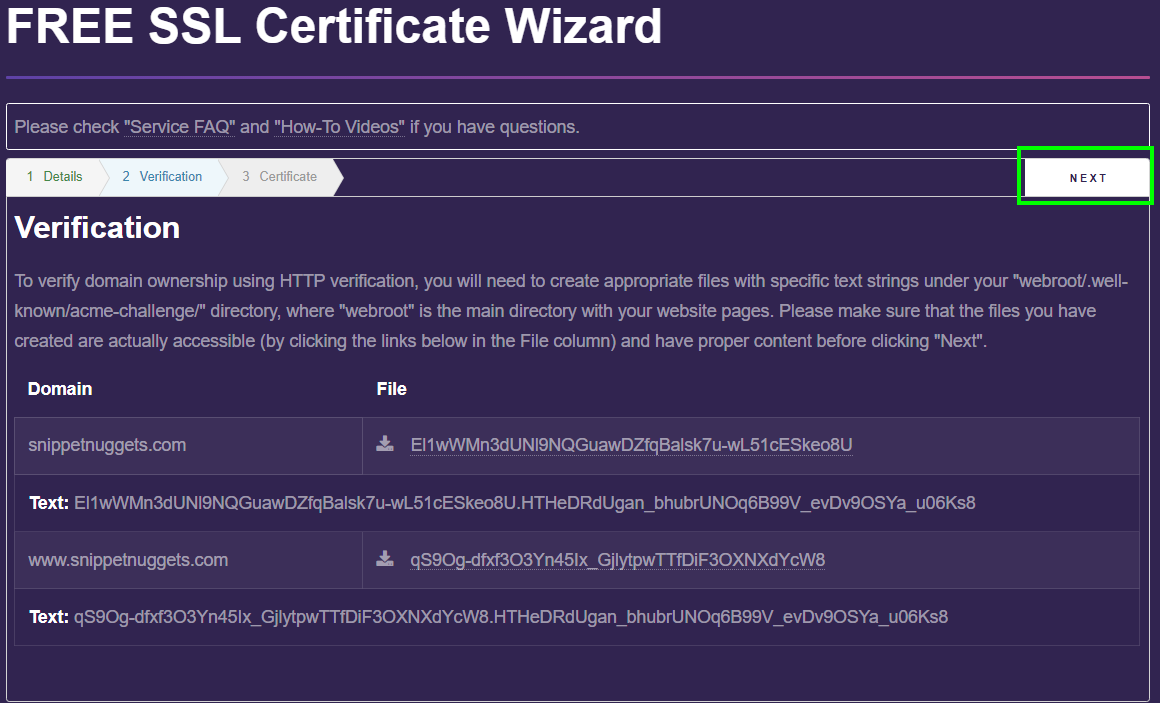
- Click NEXT again and ZeroSSL will generated 2 files which you have to host in your website at a path told by ZeroSSL. This step will ensure that you are the rightful owner of website for which you are generating SSL Certificate because you are proving that you have permissions to host something in your website.
Download given 2 files as shown below
-
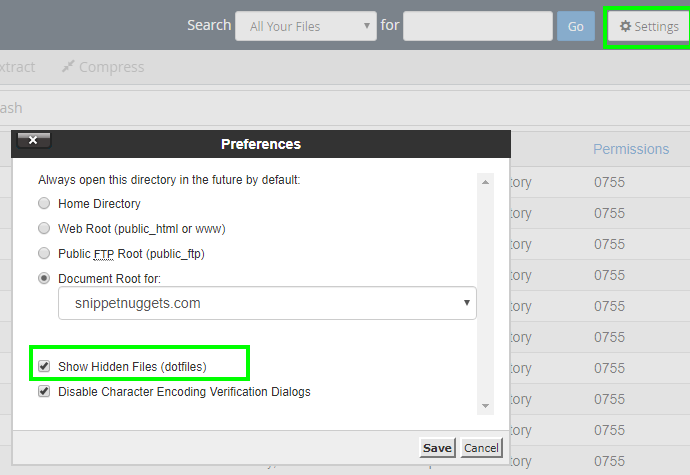
If you are not able to see any of the folders or files starting with ".". Go to Settings in your cPanel's File Manager and select Show Hiddle Files(dotfiles) as shown below.
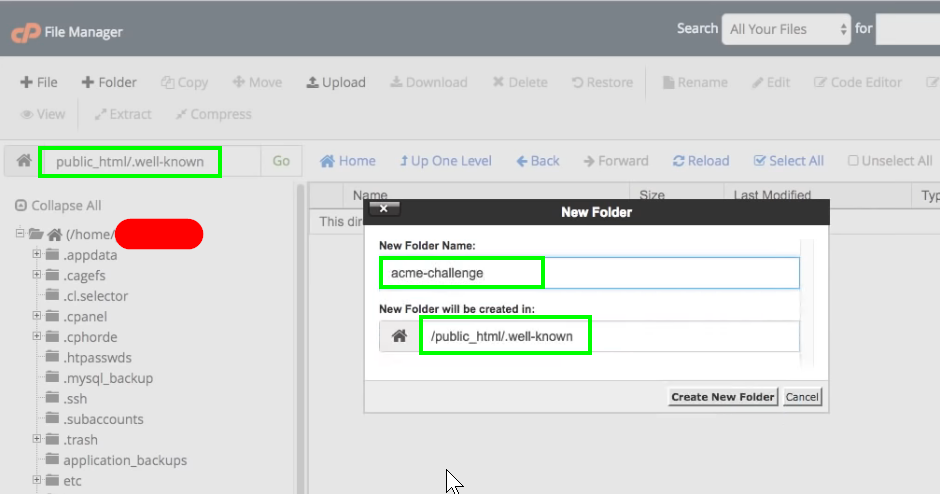
Go to File Manager in cPanel and open public_html. Inside public_html create a directory named .well-known and inside .well-known create directory acme-challenge. Please notice above image path for the 2 files to be uploaded.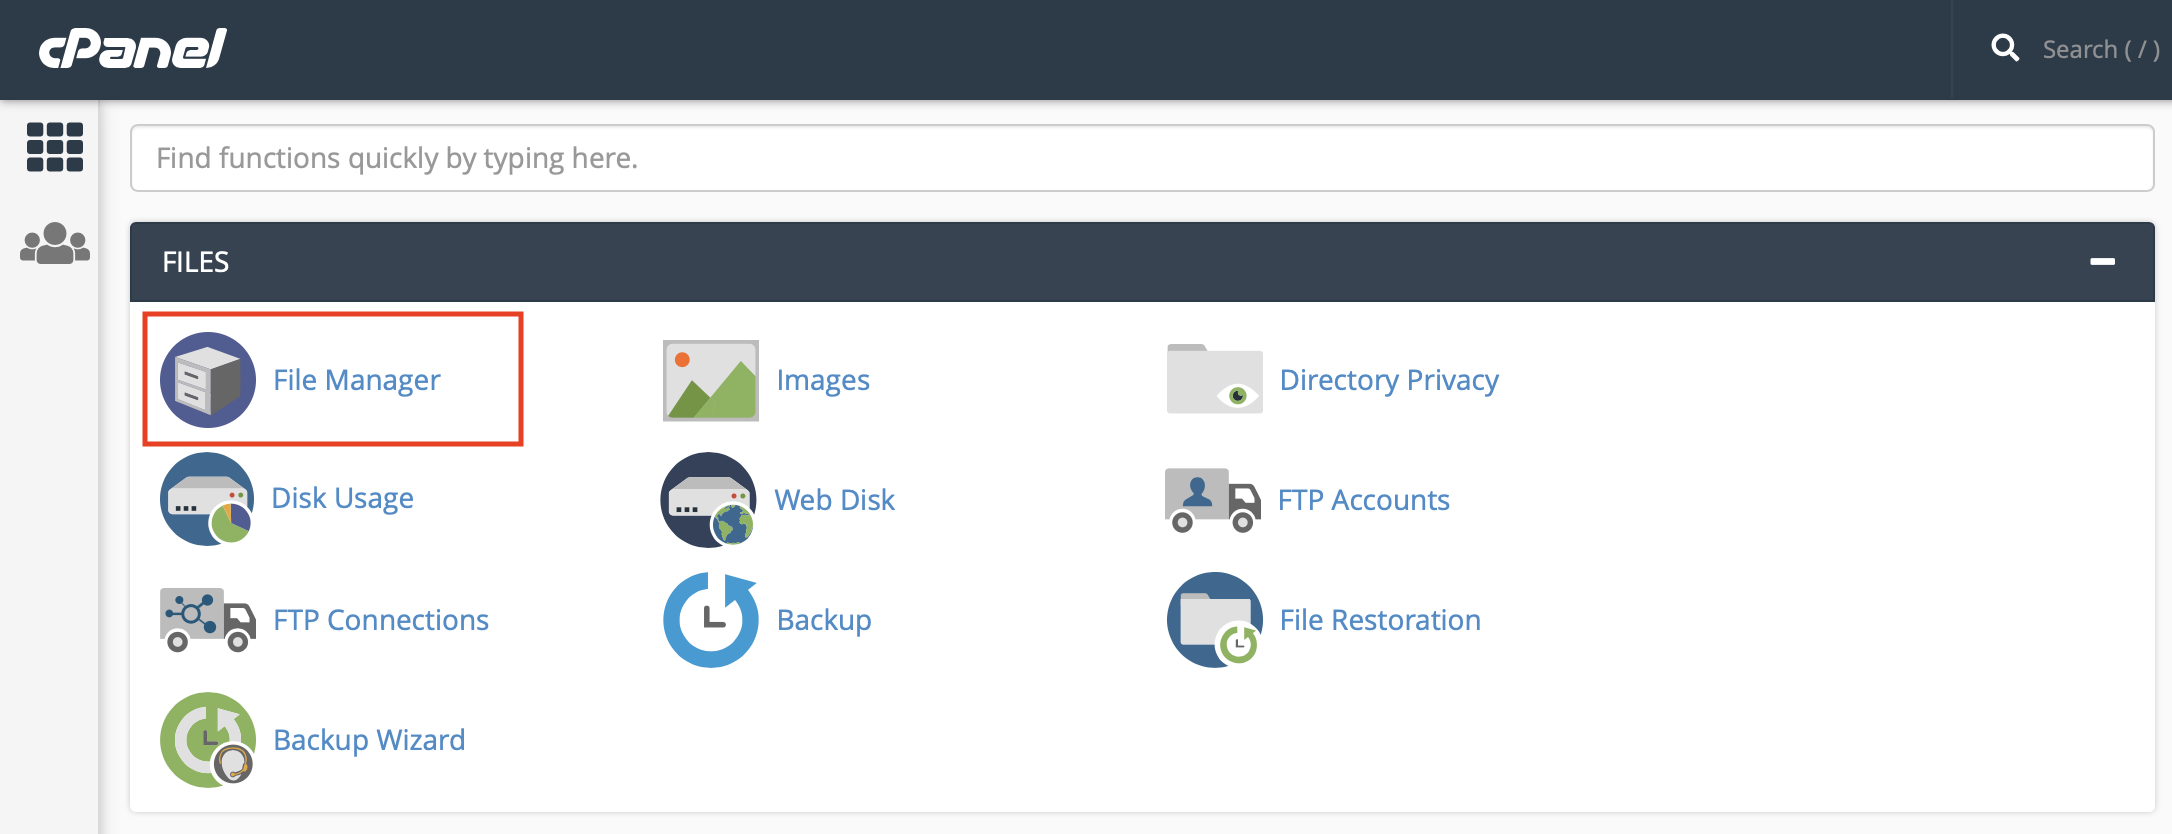

- Click on NEXT on ZeroSSL wizard as shown below. It will take to
- Next screen will show Success message, if you have correctly uploaded 2 files in above steps under .well-known/acme-challenge
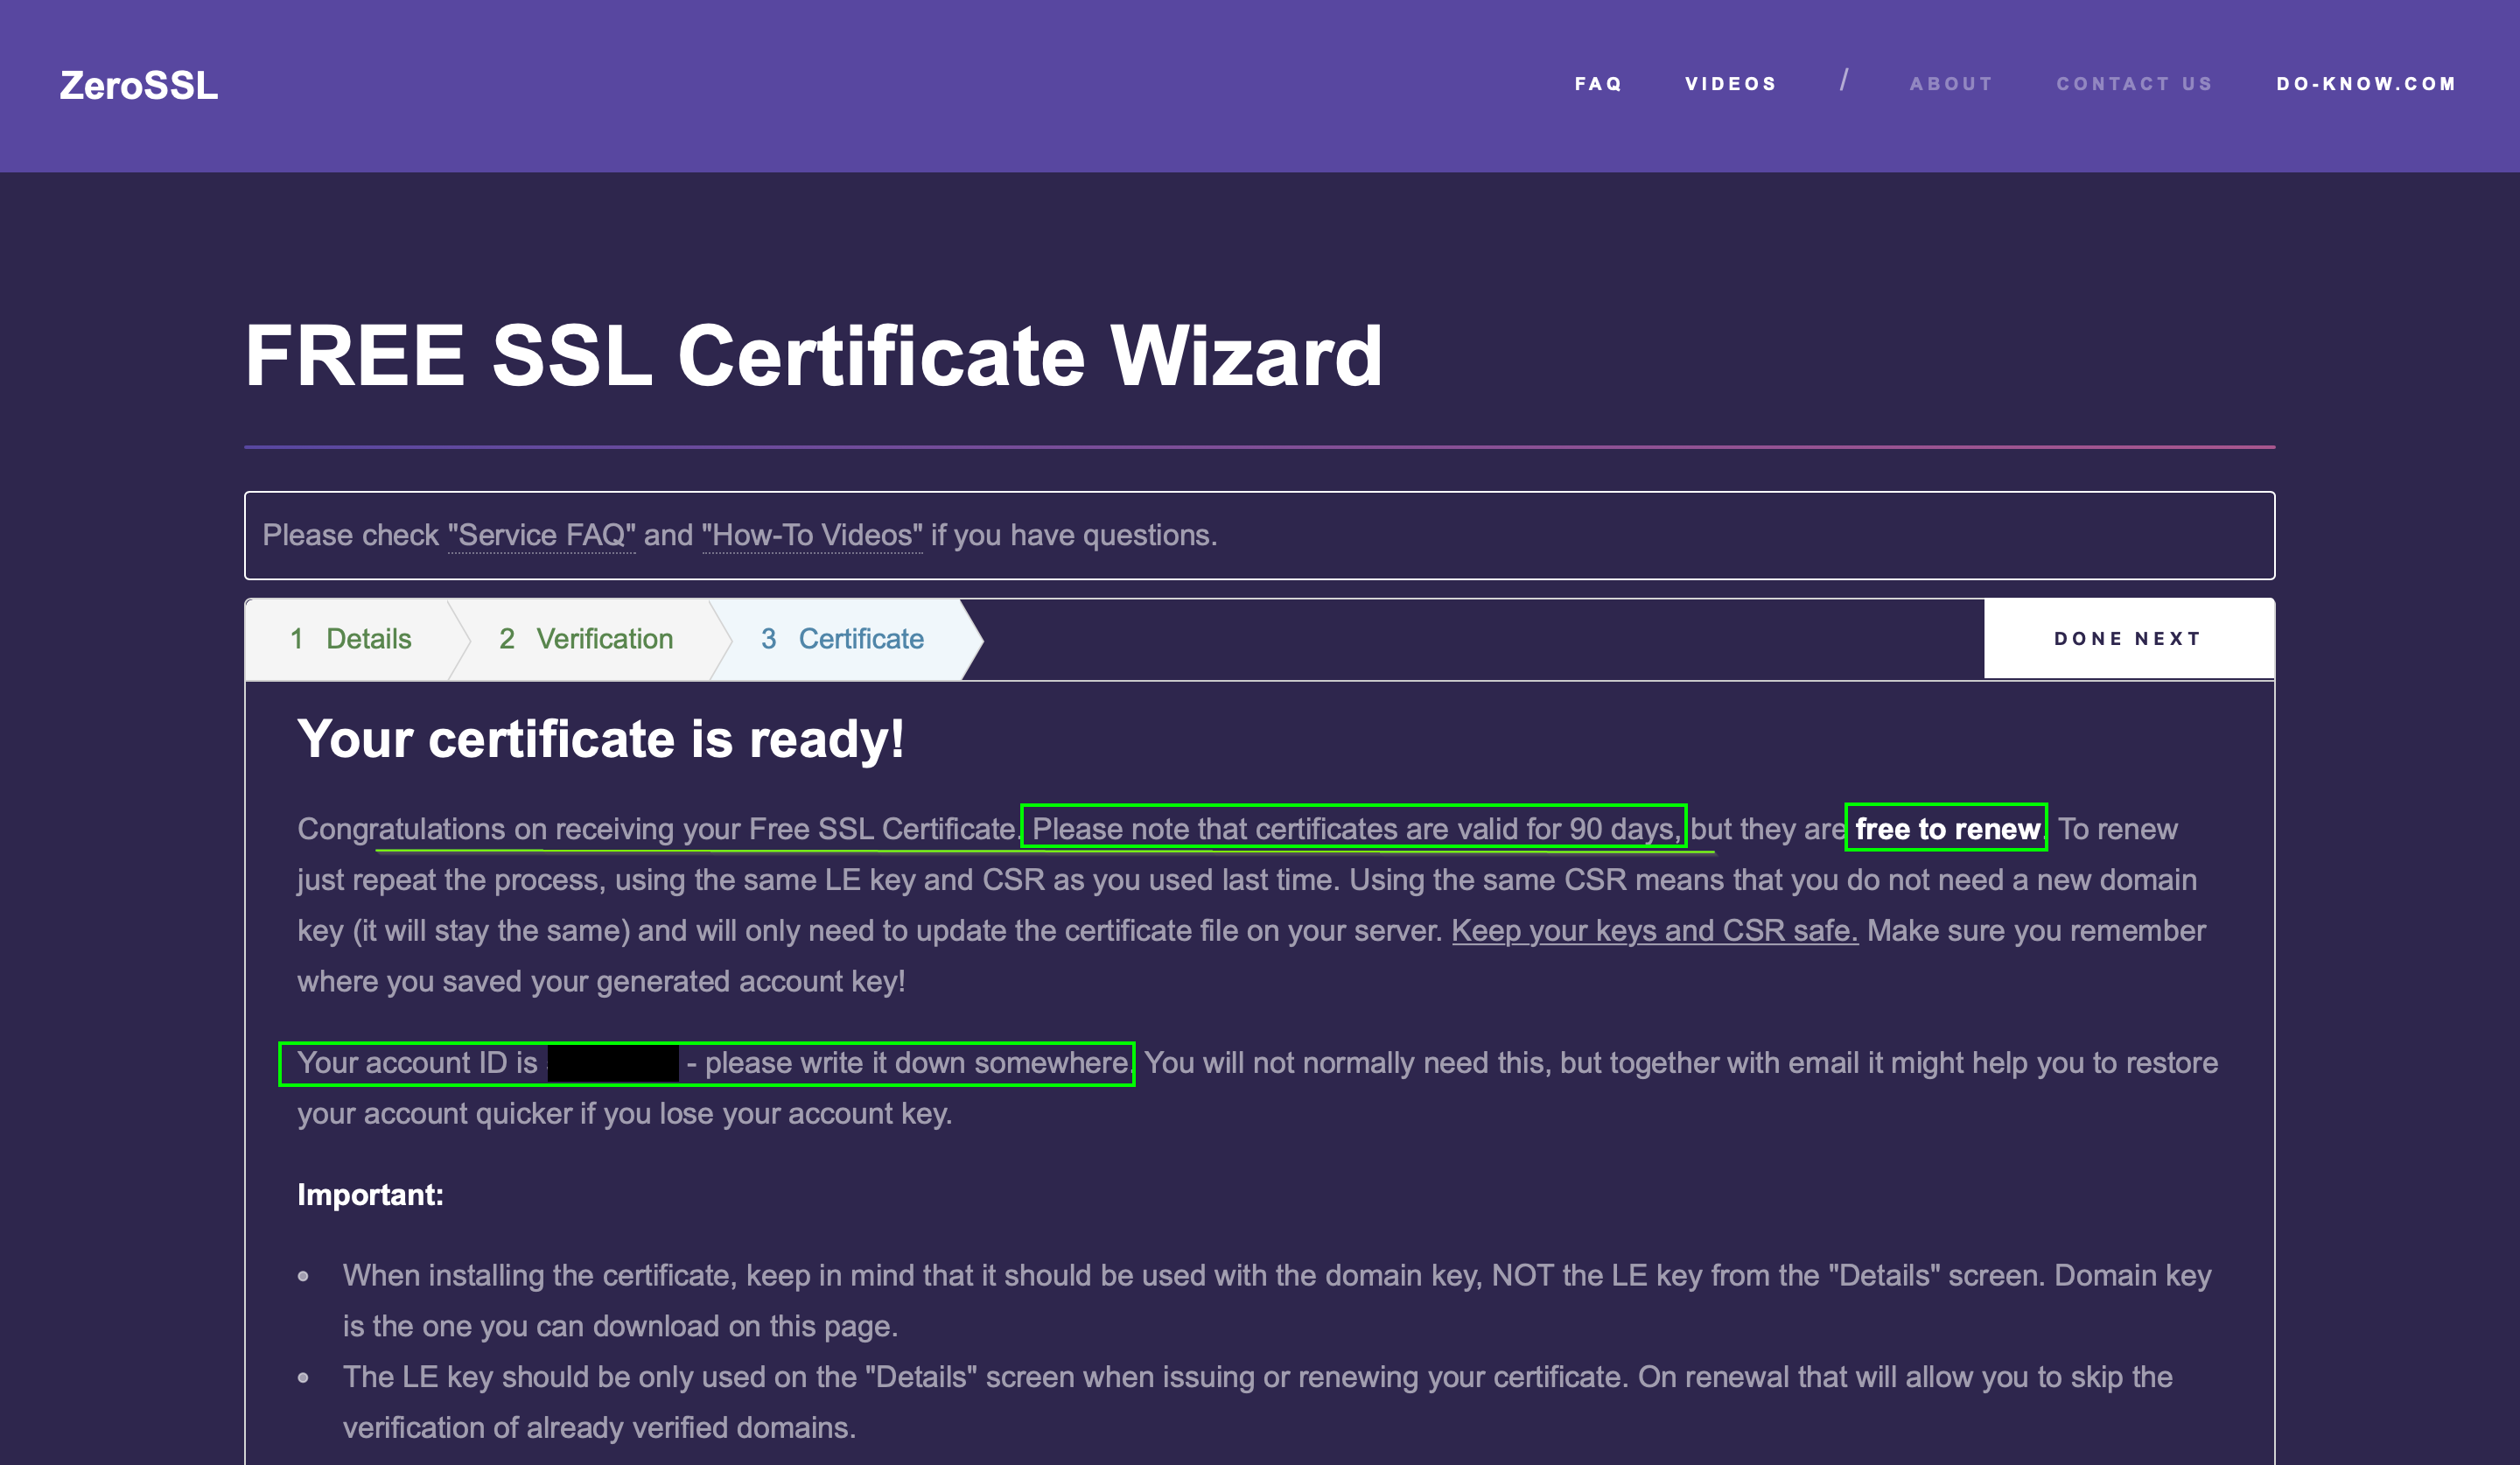
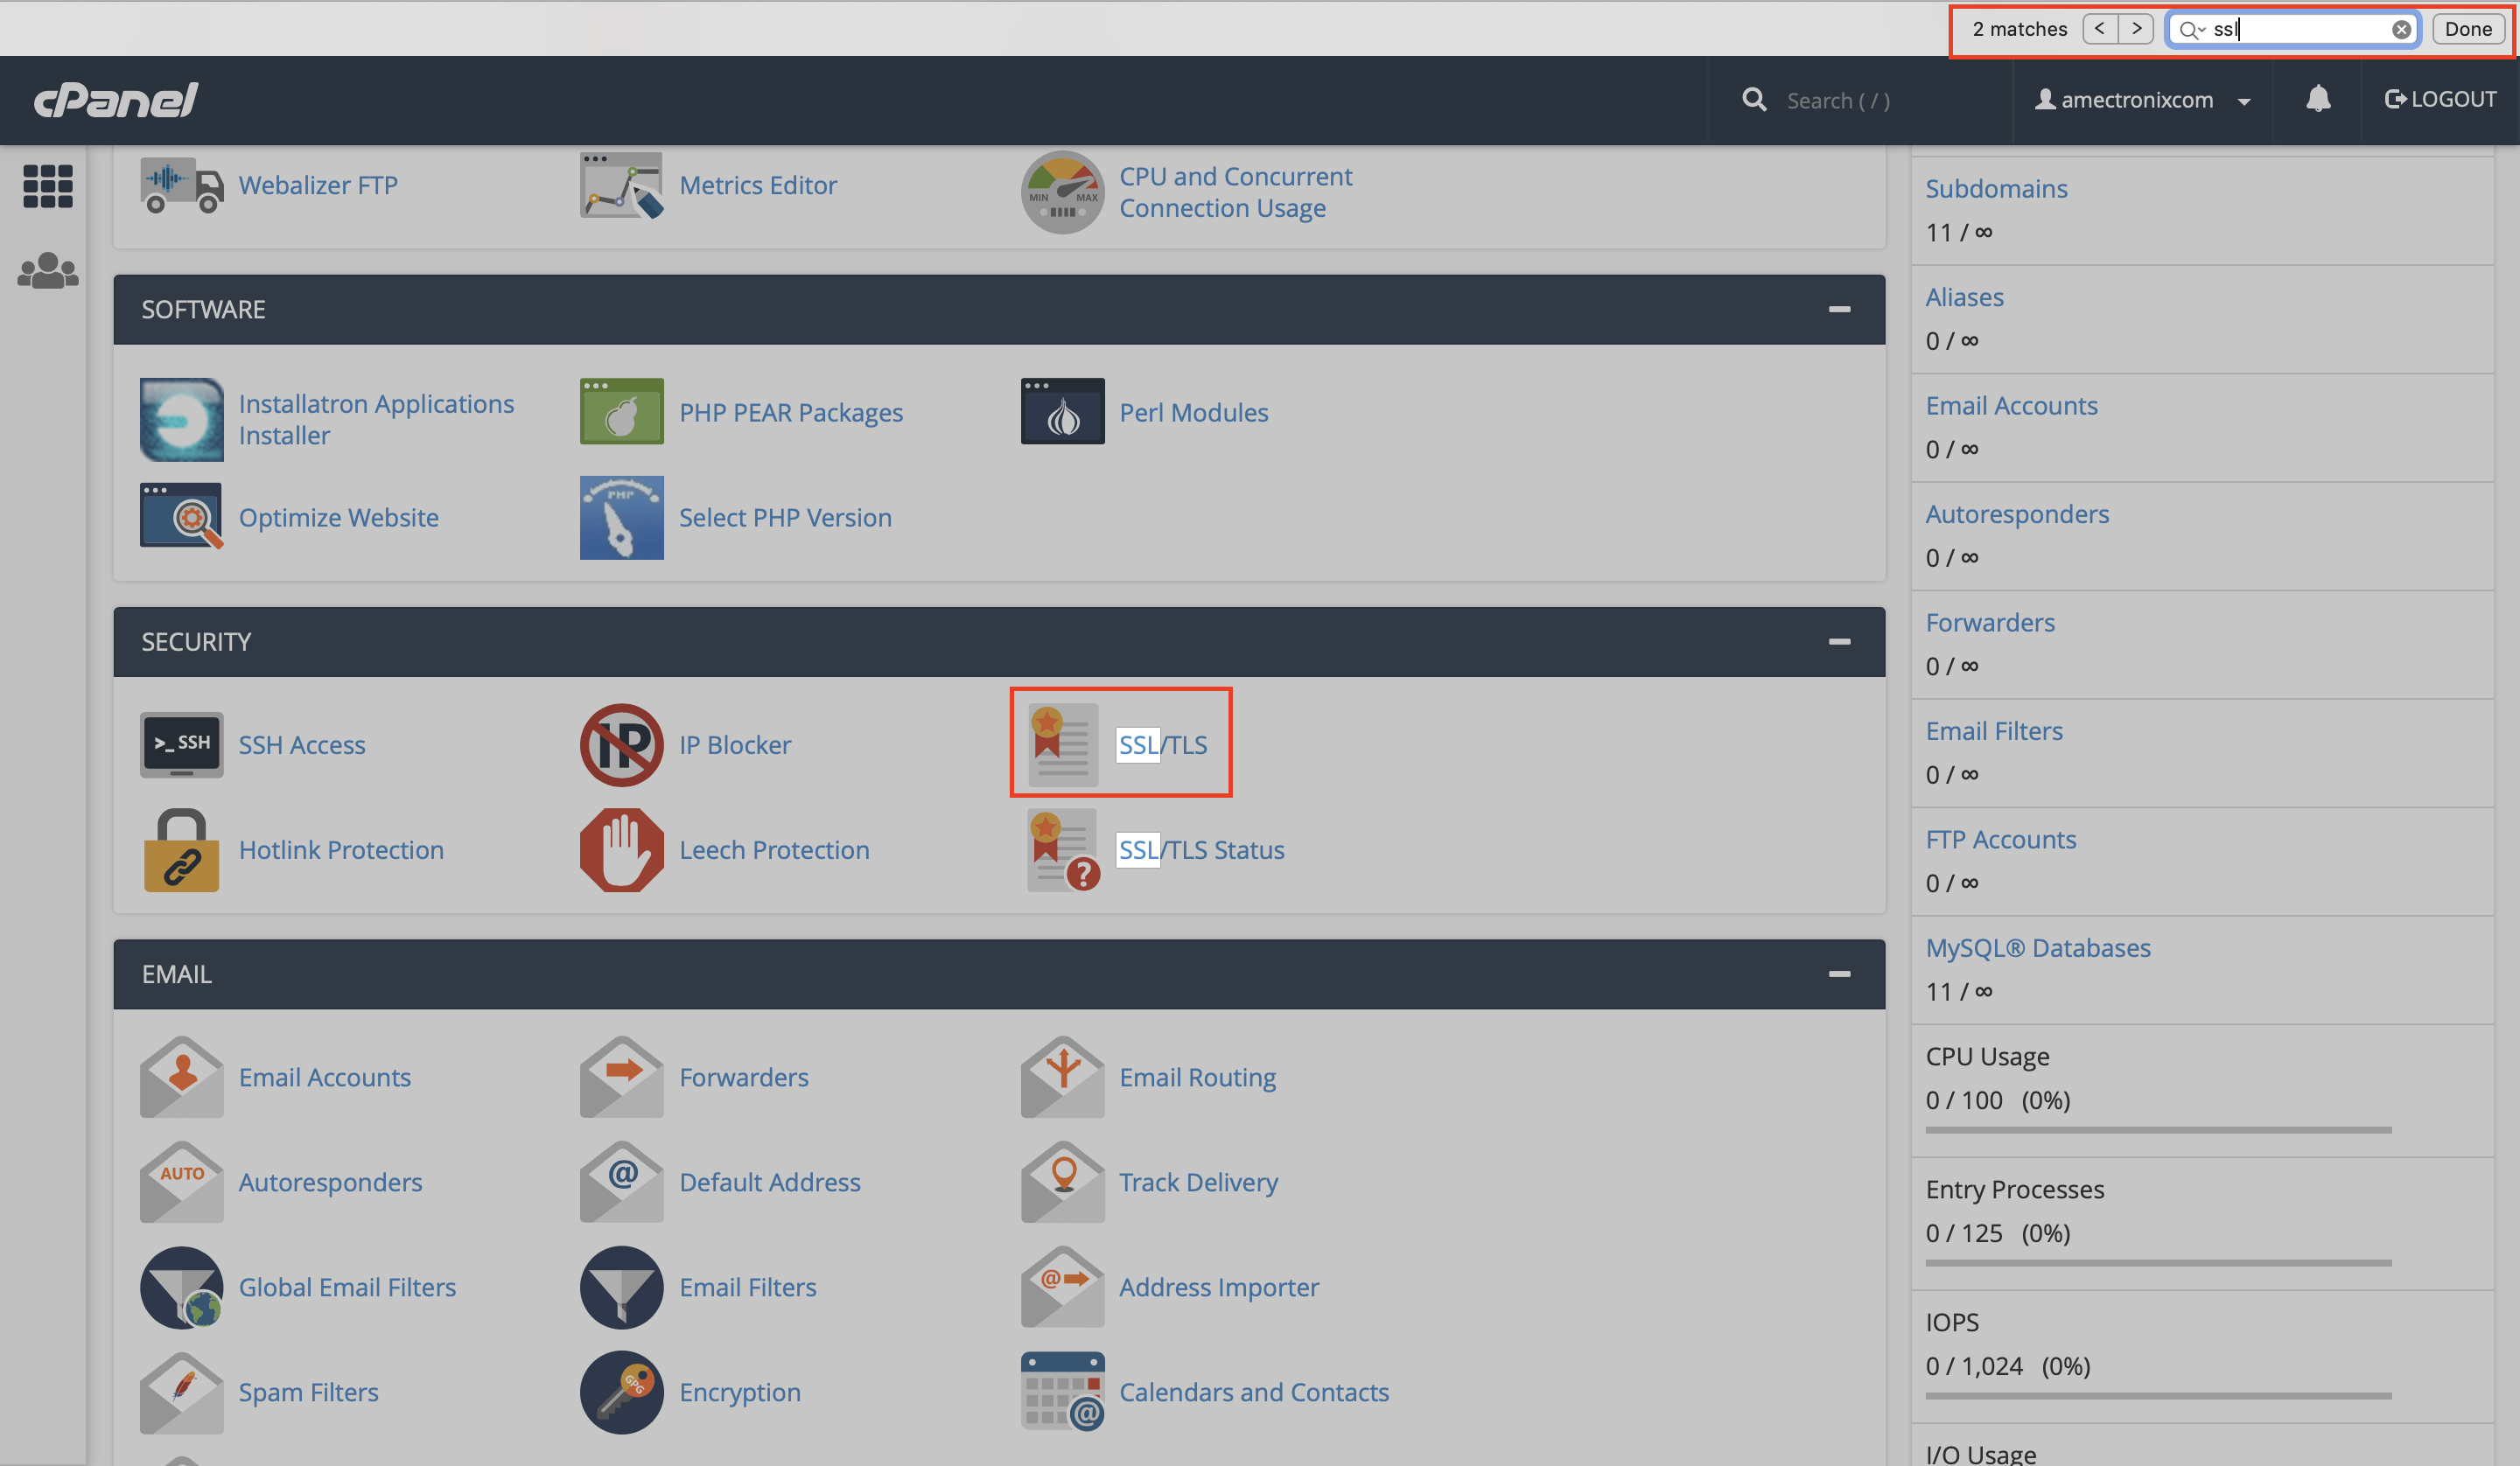
- Ignore the top part of the screen, scroll down and download two more files (certificate and RSA key). Your job is almost done. In GoDaddy’s or your host provider's cPanel, open CPanel Admin and go to SSL/TLS under SECURITY as shown below. Open the SSL/TLS page.
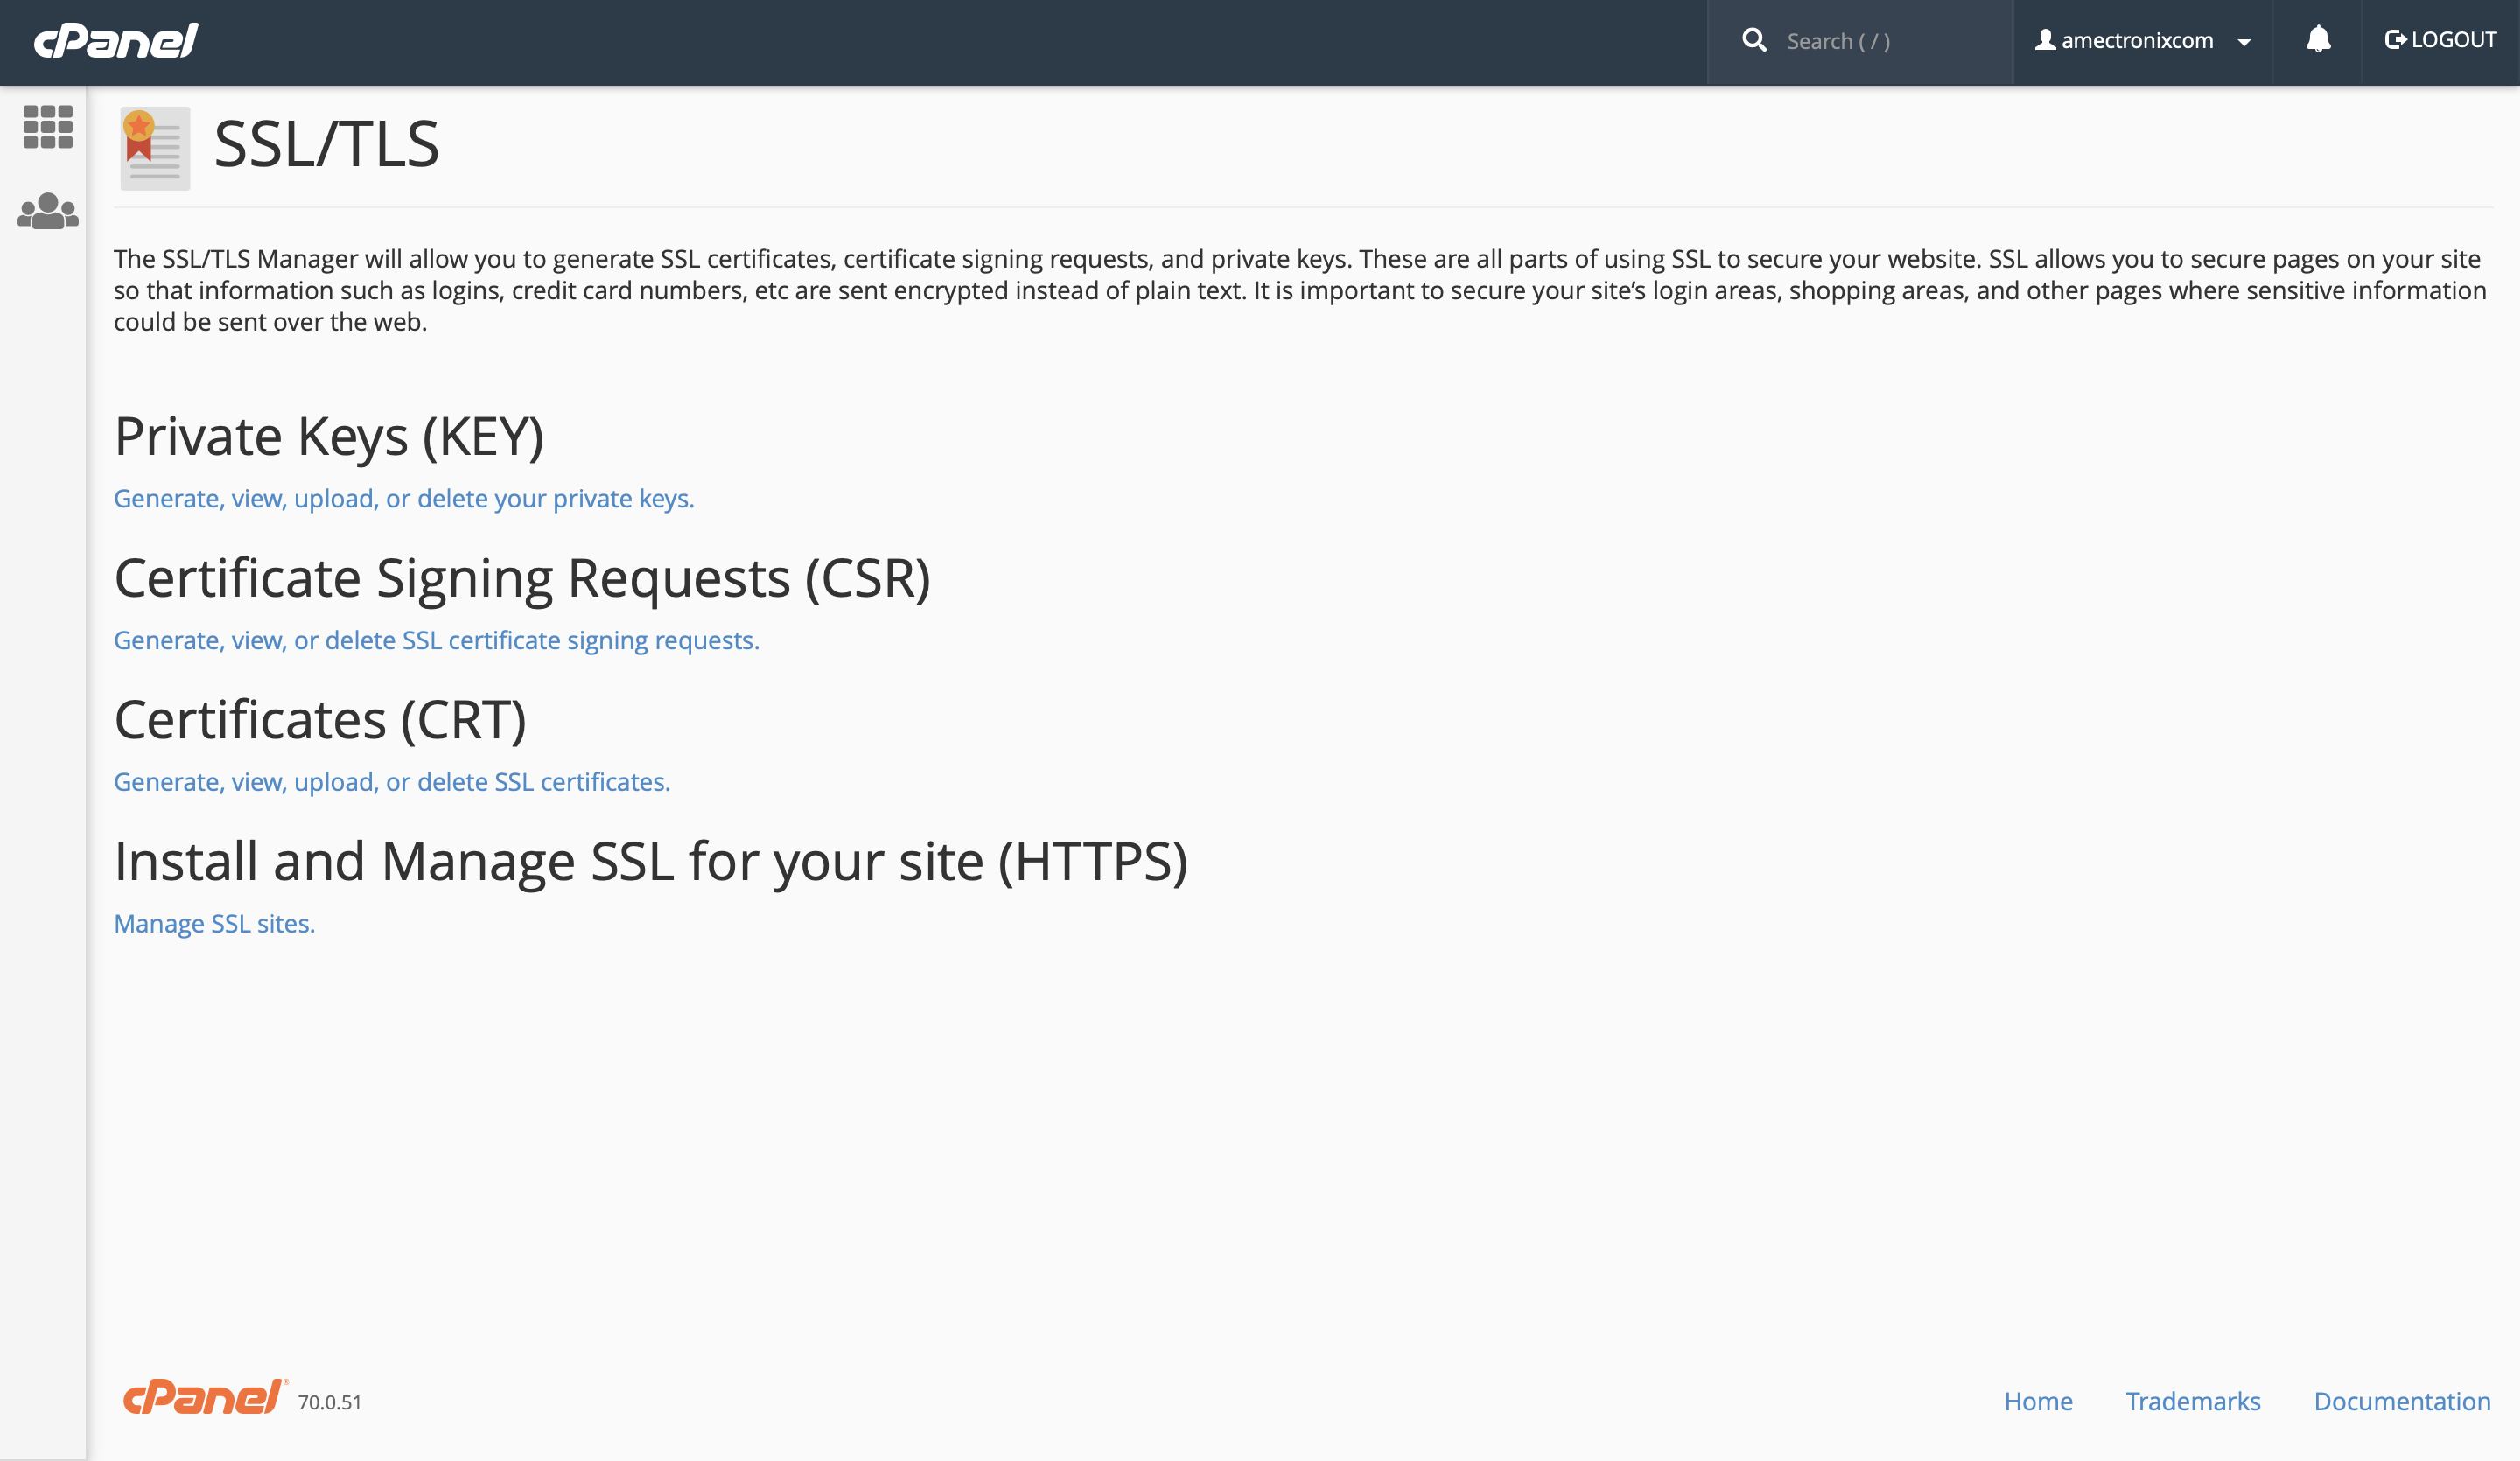
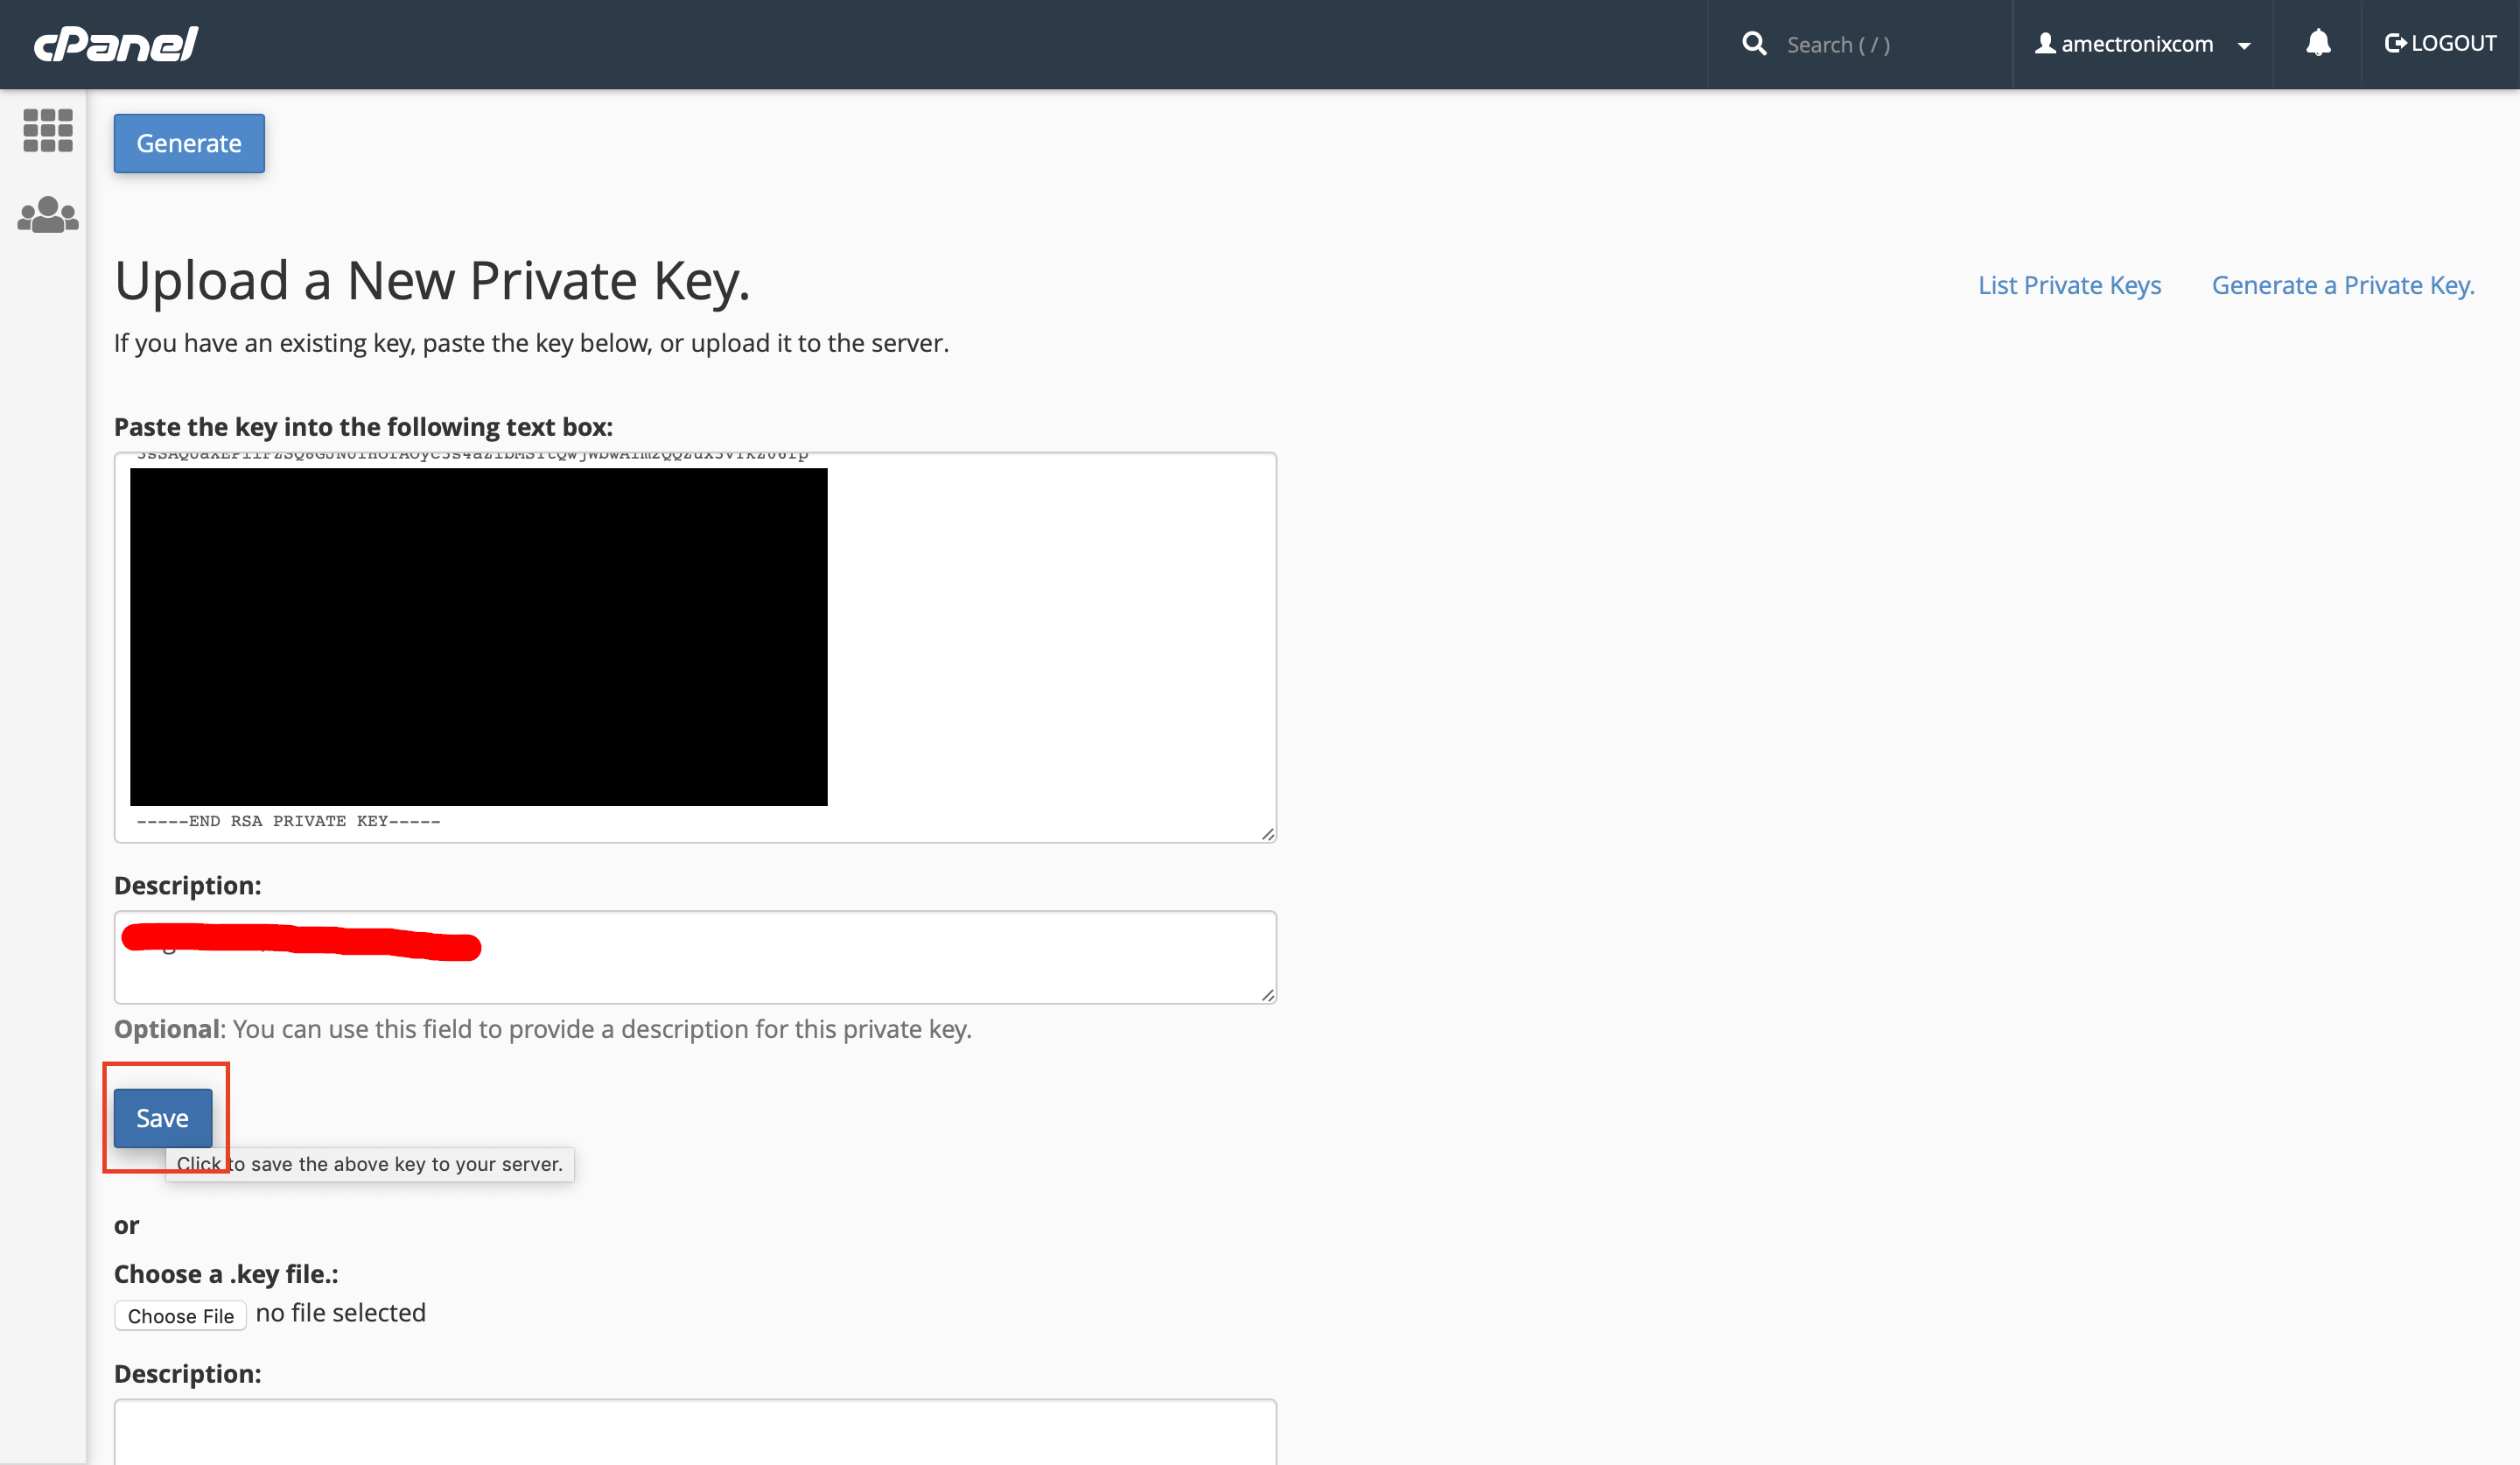
- Open “Private Keys (KEY)” page. Scroll down to a section that says “Upload a New Private Key.” On your computer, open a file “domain-key.txt” that you downloaded earlier from ZeroSSL. Copy-paste the content of your file into the field that “Paste the key into the following text box”. Add description such as “yourdomain.com www.yourdomain.com” to be able to easily identify the key later. Click “save” to save your key.
-
Click “Go back”, scroll down to the end of the page and click on “Return to SSL Manage” link, then go to the Certificates (CRT) page. Delete any of the old certificates for your domain if available. Scroll down to the Upload a New Certificate section and copy-paste the content of your domain-crt.txt file.
Please note that in domain-crt.txt has two enteries. Just copy-paste first section including — — -BEGIN CERTIFICATE — — - and ends with “— — -END CERTIFICATE — — -. Inserting two certificates will fail the process. If you inserted your certificate correctly, you will see the following info about your certificate automatically identified:
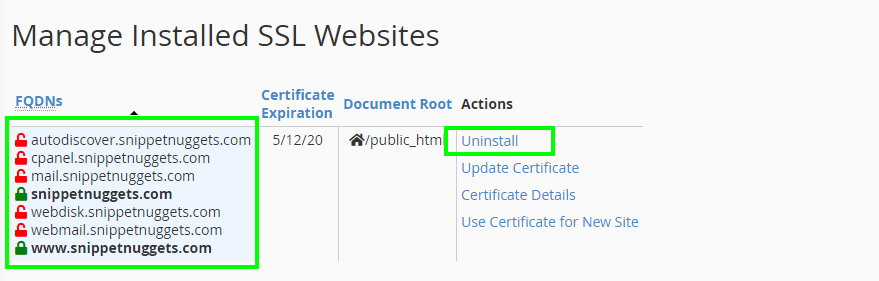
- Go back to SSL/TLS page. Click the Install and Manage SSL for your site (HTTPS) page. You will see list of certificates installed by your Host Provider by default. Click Uninstall because these certificates are installed by defaults and are not providing you SSL certificates so far.
- Scroll down to "Install an SSL WebSite". Select your domain name from dropdown list. Click on "Autofill by domain" button. All fields will be automatically populated. If you don't see all fields autopopulated, you might have committed some mistake in previous steps. Delete all the files you downloaded in your system and carefully repeat and go through them again.
If everything done correctly so far. You will see something like this below. Click Install Certificate. You will see a Successfully Installed message.

-
Now access your website through browser using https://www.your_domain_name.com format. If you see, a padlock sign, it means you have done all steps correctly.

Also, in order to redirect all the request to your website which are coming from non-https header. You must follow this step.If you are not able to see any of the folders or files starting with ".". Go to Settings in your cPanel's File Manager and select Show Hiddle Files(dotfiles) as shown below.
Goto your File Manager in cPanel and inside public_html. Create a file named .htaccess and write following 3 lines in this.
RewriteEngine On
RewriteCond %{HTTPS} off
RewriteRule ^(.*)$ https://%{HTTP_HOST}%{REQUEST_URI} [L,R=301]
Save changes and access your website with only http, it should now redirect it to https -
In case, after following all these steps, you sill can't see padlock or SSL certificate for your website. Please run a scan on your website on https://www.whynopadlock.com/
The scan result should look like below with all checkpoints Passed.
Otherwise, just see, what's the issue you are not seeing Padlock or SSL certificate in your browser's address bar.One major cause shown in this scan is, some of the URL's your website is using for internal files through http:// instead of https:// . So, you have to manually go through the File Manager's source code and change each of such occurences and then rerun the scan.
Thank you for reading it all along. Hope you liked this article!!
About the author